Sunday, October 19, 2014

Candy CASology 117

Hi friends:
I had some extra time today and thought I would check out casology blogspot's weekly challenge.  The cue card is:


I love lollipops, especially the multicoloured ones.  The swirl of colours makes me wonder "How do they do that"?  I had remembered a tutorial from years ago on making lollipops with bakers twine.  So I went to work.  I even added a wrapper. Here's my card:

Hope you enjoy my take on this challenge.  Thanks for stopping by.  Trish

Saturday, October 18, 2014

CAS Emboss It

Hi friends;
Wow what a crazy week I've had, but I found just enough time to get back into my crafty little space.  Challenge 44 - "Emboss It" from the online challenge blog:
I thought I would incorporate a couple of embossing techniques on my card...the first being "double heat embossing" and the second being "embossing with a die".  Love both of these techniques but somehow I don't use them enough.  So here's my card:


The tree stamp was stamped with versa mark ink.  Using a spoon I carefully put silver embossing powder on the top of the trees only.  I then covered the rest of the stamped image with bronze embossing powder.  The entire image was then heated with a heat tool.  The sentiment was stamped with versafine black ink.  I then ran the card through my cuttlebug with 2 Spellbinder's A2 Matting Basic dies and tan mat to emboss.  Hope you like my take on the challenge.

Thanks for stopping by.  Trish.


Wednesday, October 8, 2014

Splatter Casology 116

Hi friends
Playing along today with CASology weekly challenge.  I haven't played along for quite a long time, but thought this was a fun one.  The cue card for this week is:


I immediately thought of a brick wall with graffiti and paint splatters.... So this is my submission.


I stamped my sentiment with black ink and heat embossed with clear e/b powder.   The brick wall is a stencil from Crafter's Workshop.  I used several colors of distress ink with a blending tool for the bricks.  I also used a stencil for the splatters.  The sentiment is from Michael's $1.00 bin :)

Thanks for stopping by, Trish.

Monday, October 6, 2014

October Awareness

Hi blog friends;

I'm still on vacation and enjoying the extra time in my craft room and some online challenges.   So today I thought I would give this one a go -


The challenge is "Lift a Card".  So this is my take on the challenge.  


October is breast cancer awareness month so I dedicate my card to all the survivors and their families and friends who have supported their fight and to all the unfortunate women (and men) who have lost their battle.  May a cure soon be found!  

Thanks for stopping by, Trish.


Wednesday, October 1, 2014

Christmas Stripes

Hi there friends:
I am back again with a quick post.  I am on vacation this week and had some extra time to play along again with Merry Monday challenge blog.

This week the challenge is sooo out of my comfort zone you can't imagine.  Isn't this paper from Bobunny beautiful!  Those glittered snowflakes and swirls just make me swoon.  I see right past those stripes ....lol.  

Of course my card wouldn't be complete without ribbon and a bow.  I used a MS snowflake punch and attached a couple of mini bells.  The sentiment is from Inkadinkadoo and the border die is from Impression Obsession.

Thanks for visiting, Trish.

Wednesday, September 24, 2014

Christmas Bingo


Hey there friends:

I found this blog by accident (love when that happens) and thought it would be fun to play along.  Merry Monday #127.


I recently watched the amazingly talented Sue Wilson create a gorgeous card using a black die cut on adhesive with gilding flakes.  So using Sue's inspiration and Kathy's Christmas Bingo challenge I came up with this card for the Merry Monday Challenge.  I chose diagonal -sparkle, ribbon, buttons/brads or it could fit - sparkle, die cut, red....see for yourself and decide. What a fun challenge.


Using black cardstock and new Memory Box Eliana background die I cut my background. It was adhered to 2-sided sticky tape and covered with gilding flakes.  I stamped my sentiment onto black ribbon with versamark and heat embossed with gold powder.  Using the largest poinsettia from the Memory Box Plush Poinsettia corner die and attached a brad. It is so shiny in person,  luv how it turned out.

Thanks for stopping by.


Saturday, September 6, 2014

I'm Back

Hey there blog friends; oh wow how nice it is to be back.  I've been away from my blog and crafting due to some health issues.

So lets get down to business and sharing a couple of my recent projects.  Hope you enjoy them.

I love Memory Box dies - they are so versatile and produce stunning results with very little effort.  The following cards were made from the new holiday release "Plush Poinsettia Corner" die.


Thanks for visiting, hope to see you soon. 


Wednesday, February 5, 2014

And Casology 81

Hello friends:

Wow this is a record.....this weeks' CASology submission complete and uploaded.   Whoohoo...lol.  Okay, truth be told since I missed last week's deadline I thought I would step things up a notch and get to work on this week's submission.

This week's challenge at CASology blog is:


The design team are sooo creative, their cards are just awesome -- how could one not be inspired :) So here's my submission:


Using a Classic Heart Spellbinders die I embossed without cutting the card base.  The hat and sentiment were stamped using versafine black onyx ink.  The top hat is from Gourmet Hats Off and the sentiment is from CTMH Love Always.  The bridal veil is bazill cardstock that I hand cut.  I added some sheer ribbon and some pearls.

Thanks for stopping by.
Trish G

Monday, February 3, 2014

Deadline Delay

Hello blog friends:

I have a couple of cards to share....these were made with the best of intentions for the CASology weekly challenge....but I missed the deadline.  Purple was the challenge this week and not normally a colour I choose, this was a colour challenge for me.  I really love how these turned out.  Guess I better get more organized for the next challenge...lol.


The butterfly and flourish are from Tim Holtz "Heartfelt" stamp set.  I stamped the flourish first using CTMH Hydrandgea ink, once the ink was dry I stamped the butterfly using Versafine Imperial Purple ink and heat embossed using clear e/b powder. The sentiment is from SU Wetlands set stamped using the same ink as the butterfly.  I even used a stamp-a-majig...lol


This card looks way more complicated then it is ... maybe not CAS by it is my favorite yet.  I covered a piece of white cardstock with 2-sided tape and cut the Georgous Gardenia Outine die from Memory Box and put this aside.  This will be my base and will allow for the various negative pieces to fit back into the flower while staying put.

Next I cut the Georgous Gardenia die twice in white card stock and lined them up to fit perfectly onto the sticky base outline.

I then cut the die 3 times using 3 shades of purple card stock keeping the negative pieces in place so I could easily fit the pieces in.  You can see what I mean in the photo.

The sentiment is from SU Wetlands set stamped using versafine Imperial Purple ink.

Well that's it for now, thanks for stopping up.

Saturday, January 25, 2014

Contrast Casology 79

Hi Friends;
Wow another week and another challenge.  Time is just flying by :) This week's challenge over at CASology blog is:


I think this card took me all of 10 minutes.  Anyone who knows me will agree that this is certainly a rare occurrence....lol.  So here's my card:


I die cut 2 Prized Chrysanthemum by Memory Box with black c/s. The die was placed on each of the corners of the blue c/s and die cut again.  I fitted the black die cuts back into the negative die cut spaces of the blue c/s.   The blue c/s mats were cut using A2 Matting Basics by Spellbinders.  Sentiment was stamped using versafine black onyx ink.  The trickiest part of making this card was fitting the die cuts back into the negative spaces and gluing the intricate die cuts down.

Thanks for stopping by.

Sunday, January 19, 2014

Dot Casology 78

Hey there friends;

I've been out of commission this week from a recent slip on some ice.  Guess I don't bounce as good as I used to....ha!

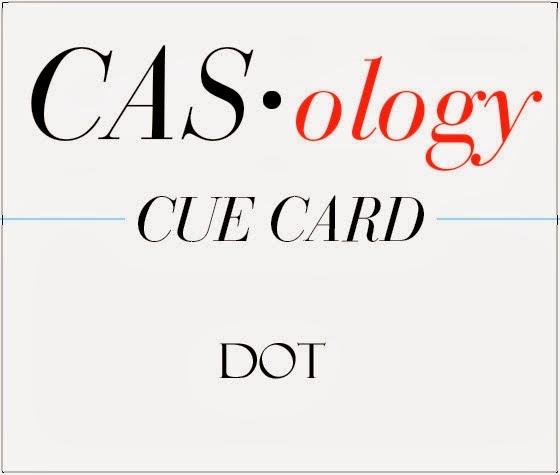
This week over at casology the weely challenge is:


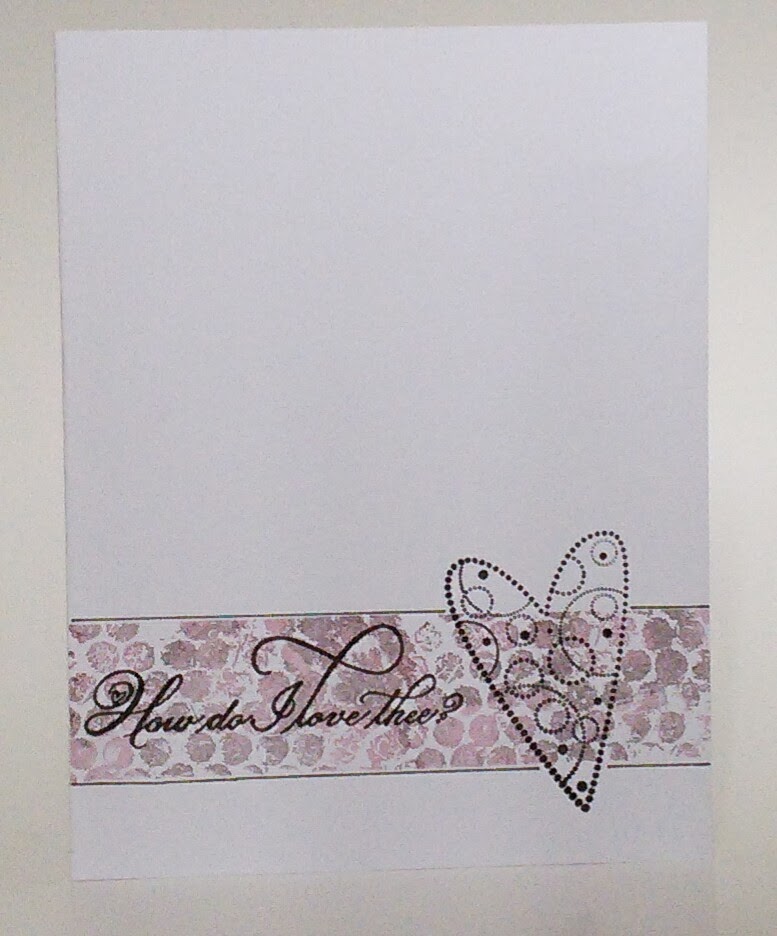
So this was my take on the challenge.


I masked off white card stock and 2nd generation stamped the background using verasfine black onyx and crimson red ink. The stamp is Stained Texture from Bobunny.  The sentiment and heart were stamped using versafine black onyx ink. Sentiment is from Flouishes Lace Heart.  The dotted heart is unknown.

Thanks for stopping by.

Monday, January 6, 2014

IO Blue Challenge

This card was made for my sister's birthday as she loves blue.  I will also be submitting it at Impression Obsession blog for their "blue" challenge.


The blue cardstock was stamped with rose lace cover-a-card stamp using perfect medium and then heat embossed using gold pearl e/p.  Using border die 2, I die cut blue cardstock and layered it with some ribbon and pearls.  The sentiment is from the hydrangea set.  I only own 2 IO stamp sets and luckily this one works nicely.

Impression Obsession Stamps
Cover-a-card rose lace
Hydrangea stamp set (sentiment)

Impression Obsession Dies
Border duo 2

Thanks for stopping, hope your keeping warm :) its -40 today burrrrrrrrr....lol.

Wednesday, January 1, 2014

Party CASology 76

Happy New Year!

The Casology blog challenge is extended for 2 weeks due to the holidays....that gives me some extra time to maybe create a couple of submissions :)

The cue card for CASology 76 challenge is:


I immediately thought of using this stamp "It's A Parade" by Hero Arts.  I love this group of children (and their doggie) all walking single line down the street.  I can just see them now - how cute would that be.

Here's my submission:


The main image was stamped with versfine onyx black ink and heat embossed with clear embossing powder.  The clouds were sponged with broken china and the grass sponged with mowed lawn distress ink.  I cut the image out with spellbinders circle die and I added piercing around it.  The sentiment is from the dollar bin at Michaels :)

Thanks for stopping by.

Tuesday, December 31, 2013

IO Quick and Simple Card Challenge

This little thank you card was super fast and easy.  I am submitting it for the Impression Obsession Quick and Simple Card challenge.

Very simple 4" x 4" thank you card for those very generous christmas gifts we received this holiday.  Here's my submission.


I used the following supplies:

  • IO Pine Branch Die
  • IO Cover a Card Nordic Stripes
  • IO Hydrangea Cling Stamp (sentiment)
  • Versamark 
  • White embossing powder
  • Versafine Crimson Red Ink
  • Ribbon
  • Bling
Thanks for stopping by.

Saturday, December 21, 2013

Knit CASology 75

Welcome friends:

I was MIA last week as I had some out of town guests.  All caught up now - just a couple of last minute Christmas preparations.

Okay so back to blogging and challenges - this weeks' CASology challenge is:


I was so impressed and inspired by the knitting done on Meghan's card so I thought I'd give it a try.  Knit a mini sweater NOT GONNA HAPPEN but a few stitches - I CAN DO THAT ...ha ha.  Honestly, I've been wanting to give mini knitting for cards a try and this was my window of opportunity :)

So here's my submission - I just love it  :)


The background stamp is cover-a-card by impression obsession called Nordic Stripes. Using ranger perfect medium, white card base was heat embossed using rich red e/p.  The mini knitting needles are tooth picks with crafting beads.  I casted on some stitches using crochet yarn and "ever so carefully" knitted a few rows.  To give my card a vintage feel I tied a couple of bows using cheesecloth and hemp cord.  Walnut stain was used to give my card an aged look.  The sentiment is from CTMH Captured Moments.  I am hooked, love the tiny knitting :)

Thanks for stopping by.

Monday, December 9, 2013

Christmas Tag Exchange

Tags, tags and more tags....my 12 tags are done and ready to go....almost a week early.

Here are a few close ups.  The poinsettias were cut from Spellbinders, the branch is IO and the deer is from Tim Holtz.  The deer is cut out of wood veneer and inked using tea die distress ink.  I love how these turned out.


Christmas Ribbon Tree

I had a couple of requests for directions for the ribbon tree that I made for CASology ribbon challenge.

This is what I followed - although I didn't measure my ribbon :)
I don't know who to give credit too as these same pictures and directions seem to be on a few websites.


1, Cut six pieces of 3/8″ (9.5mm) grosgrain ribbon: Two pieces that are 2.75″ (7cm), two pieces that are 2.5″ (6.35cm), and two pieces that are 2″ (5cm).
2, Fold and glue ribbons as shown
3, Glue longest loops on brown ribbon 
4, Glue 2.5″ loops as shown
5, Glue 2″ loops as shown.
6, Make a bow
7, Glue bow top to the tree

Sunday, December 8, 2013

Ribbon CASology 73

Hello Friends;

Phew made it just under the wire this week to play along with CASology weekly challenge.  Cue card this week is:


Yahoo this is one of my favourite card elements and I rarely make any cards without a ribbon or bow, even if it's for a guy...ha!.  For me ribbon is one of those "go to” elements that add that extra touch to any project and because there are so many varieties and so many beautiful patterns a small piece of ribbon can make a very bold statement.

So here is my submission.


Have you seen these little ribbon trees before?  There are tons of directions on pinterest for making them - easy peasy and especially cute clips in the hair of little girls or pinned on a sweater.  Keeping it CAS - my card base was embossed using provocraft "Flurries" embossing folder.  Sentiment is from CTMH "Say It With Style" stamped with versamark fine olympia green ink.  The ribbon tree is made using green and brown ribbon which was recycled from a previous gift package :). Yes I save scraps of ribbon....lol.  Gold ribbon is from recollections.

I am heading back to my craft room now to finish my 12 tags for a tag exchange.  This is the first year I've participated - it's okay to call me chicken...lol.  I will post a couple of pics later today..notice the amount of ribbon I used...lol.

Thanks for stopping by.
Trish

Friday, November 29, 2013

Shop CASology 72

Hello Blog Friends;

It's been so hectic around here  - lots to do for Christmas which seems to be getting closer and closer by the minute.

The best part of this time of the year is the amount of time I find myself spending in my craft room making cards, tags and other craft gifts for Christmas :)

This week over at Casology, the cue card challenge is:


Oh my -- could this challenge be any more perfect for this time of year (especially since black Friday - only the biggest shopping day of the year was this week) - pure genius I say...ha.  So, I hope you get a chuckle and enjoy my take on this challenge.


The "Fainted Chicken" stamp is from Art Impressions.  I stamped it 3 times using black onyx versafine ink.  After coloring the beeks and legs with distress markers, I fussy cut 2 of the images.  They were then layered over my card base image with liquid dots.  The sentiment is a free digital stamp from birds cards blog.  I couldn't help but add some tail feathers....lol...and to make my card festive, some bling snowflakes.  Thanks for stopping by.

Monday, November 25, 2013

Wood Inlay Tags

Welcome blog friends:

I have to apologize for this very short post.  I just couldn't wait to share this very cool technique that I have been experimenting with. I stumbled on a tutorial (which I can't find right at the moment, but I will keep looking for it) whereby the tag was made using a piece of wood paper. Well I couldn't find any paper but did find very thin veneer.  Well it worked!  Shreek!  


A piece of very thin 1/32 birch wood veneer was die cut using a memory box die.  I carefully inked the die cut piece and then "inlayed" it back into the wood tag.  To keep the cut image from popping back out I covered the tag back with a piece of adhesive.  Distress inks were used to colour the die cut.  Please ignore the smudge that I got when stamping my sentiment.  I'll figure out a way to conceal that :) ha.

Ohhh I can't wait to try some more dies.  Here's another one.